While playing “The First Descendant“, when players select a mission or activity, they have the option to enter matchmaking. This system pairs them with other players looking to complete the same mission. The matchmaking system balances teams based on multiple factors such as the level of the payer, gear score, and composition of class to ensure a better experience.
But recently players have been experiencing “Matchmaking Error ME: 0008” while playing the game. They are not able to get their teammates from the game and continue their gameplay as they want. But don’t worry if you are also facing this issue, we’ve got a solution for this. In this guide, we are going to discuss them.
People also search about: The First Descendant Disk Write Error: Fix
Why Matchmaking Does Not Work?
It can be due to multiple reasons, it is an online platform so devices can be complicated due to:
Server Issues: The game’s servers may experience heavy traffic, which can lead to errors.
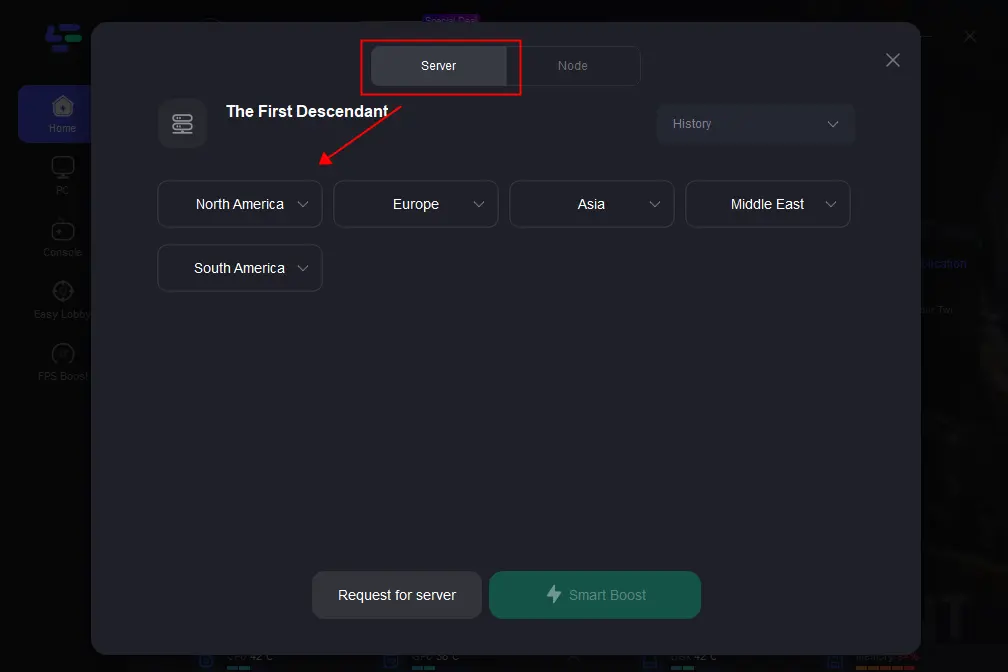
Region Restrictions: If you’re trying to matchmake with different region players, this causes errors.
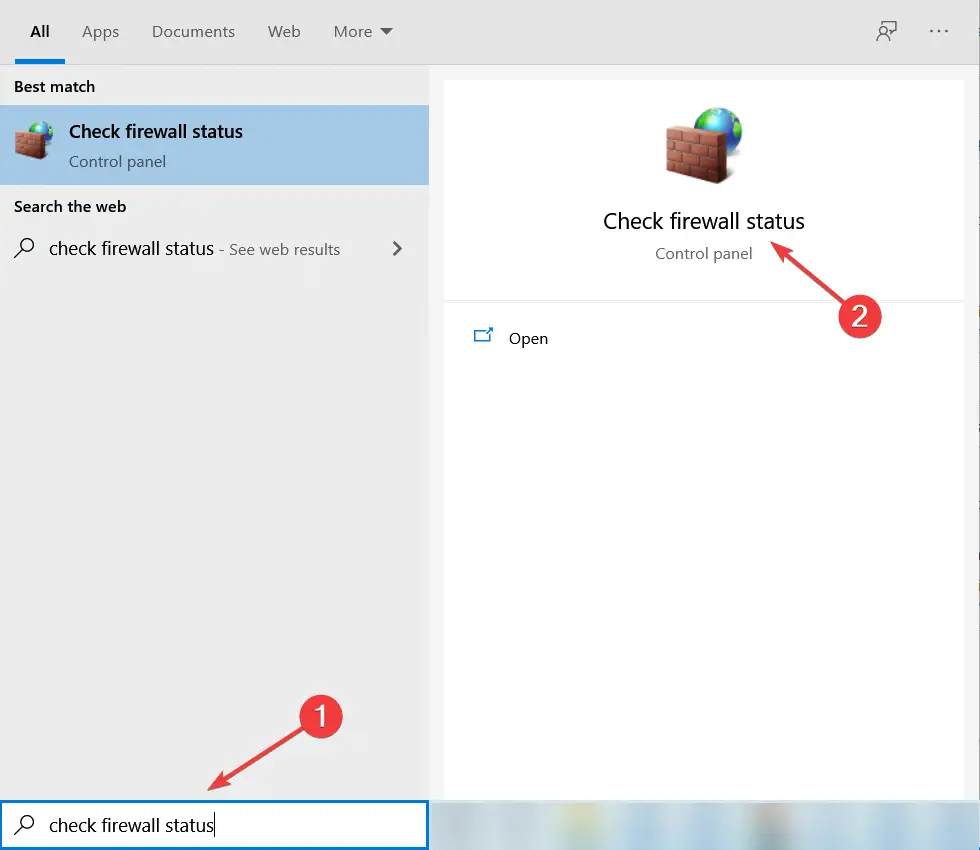
Firewall Problems: It might block important game data, that prevents players from matchmaking.
Account Issues: Sometimes there is a problem with your game account, like some restrictions, or issues with your game license.
Matchmaking is necessary for players to pass difficult levels by having their teammates. Here are the solutions to solve the problem:
How to Fix Matchmaking Error ME: 0008 In The First Descendant
Here are the working solutions that’ll help you get over the problem and continue your gameplay by having your teammates:
Switch DNS Servers:
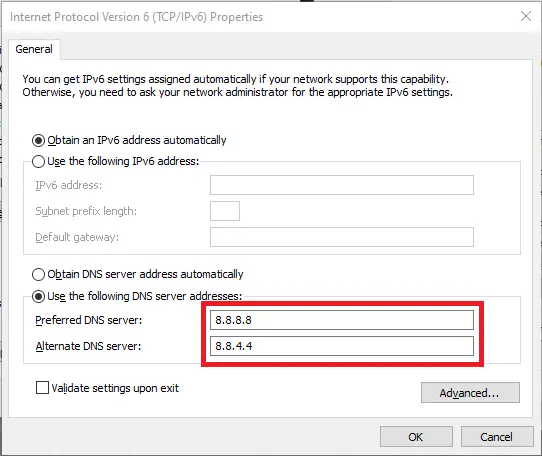
Changing DNS Servers improves game speed because some DNS servers are faster than others at translating domain names into IP addresses. Switching to a public DNS server like Google DNS (8.8.8.8 and 8.8.4.4) or Cloudflare DNS (1.1.1.1). improves connection stability. Here’s how you can change the DNS Servers:
On Windows:
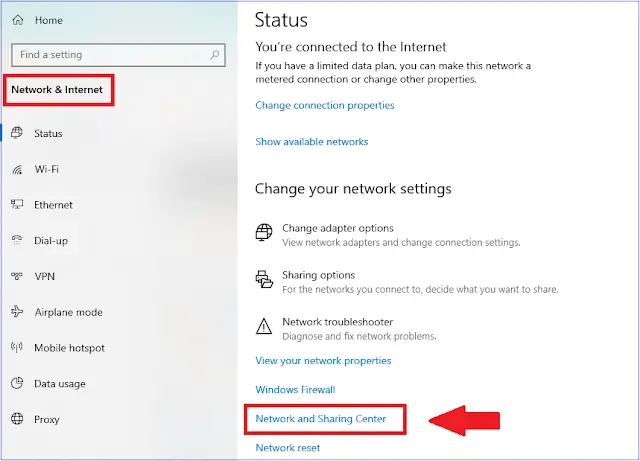
- Open Network Settings:
>Right-click the network icon in the system tray.
>select “Open Network & Internet settings”.
>Click “Change adapter options.”
- Select Your Network Connection:
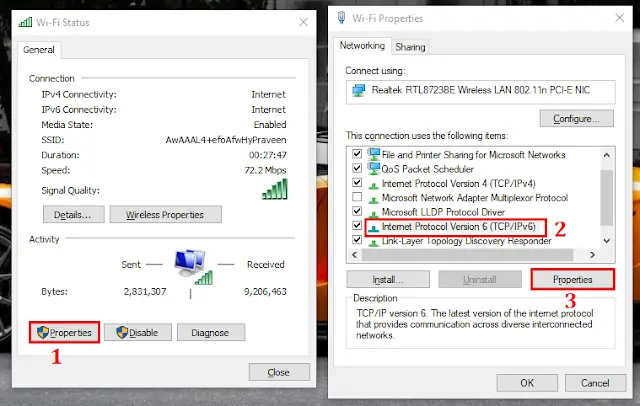
>Right-click on your active network connection and select “Properties.” - Modify DNS Settings:
>Select “Internet Protocol Version 4 (TCP/IPv4)” and click on “Properties.”
>Select “Use the following DNS server addresses.”
>Enter the alternate DNS server addresses.
- Save and Close:
>Click “OK” to save the settings and close all windows.
On macOS:
- Open Network Preferences:
>Click on the Apple menu and select “System Preferences.”
>Tap on “Network.”
>And then select your active network connection (it can be Wi-Fi or Ethernet) and tap on “Advanced.”

- Modify DNS Settings:
>Go to the “DNS” tab.
>Click the “+” button to add a new DNS server.
>Enter the DNS server addresses (e.g., for Google DNS: 8.8.8.8 and 8.8.4.4).
>Click “OK” and then “Apply” to save the changes.

Flush DNS Cache:
With time, the DNS Cache becomes corrupted leading to connectivity problems. Flushing it clears out old, incorrect records, and outdated DNS entries. Here’s how you can flush DNS Cashe:
On Windows:
- Open Command Prompt:
>PressWin + Rto open the Run dialog box and typecmdand pressEnter. - Flush DNS Cache:
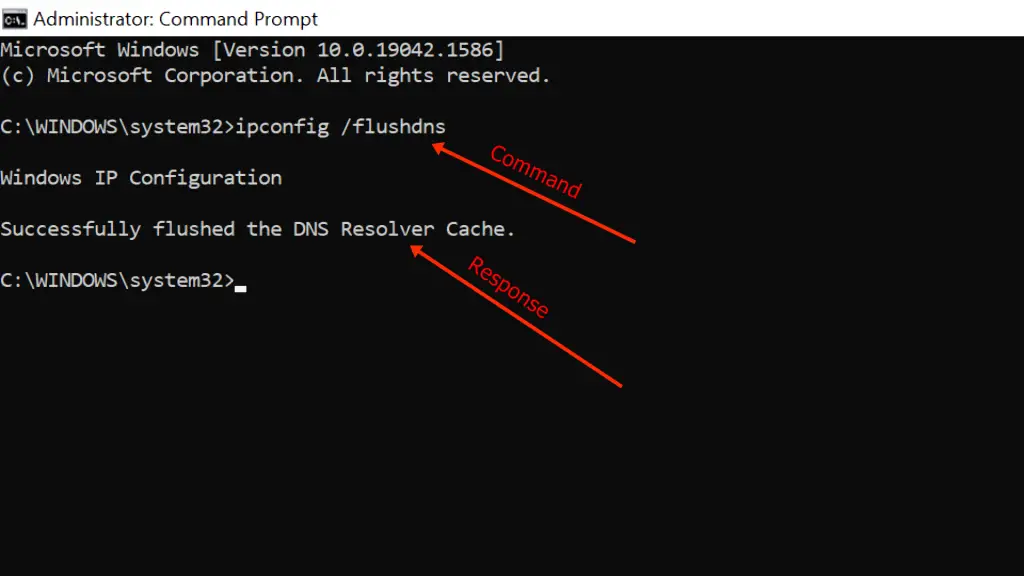
>In the Command Prompt window, type the following command and pressEnter:ipconfig /flushdns
>You will see a message confirming it.
- Restart Your Computer:
>After flushing the DNS cache, restart your computer to ensure all changes take effect.
On macOS:
- Open Terminal:
>PressCmd + Spaceto open Spotlight Search.
>TypeTerminaland pressEnter.

- Flush DNS Cache:
>In the Terminal window, type the following command and pressEnter:sudo killall -HUP mDNSResponder
>Enter your password when prompted.

- Restart Your Computer:
>Restart your computer to ensure all changes take effect.
On Linux:
- Open Terminal:
>Use the preferred method to open the Terminal. - Flush DNS Cache:
>Depending on your Linux distribution, use one of the following commands and pressEnter:sudo systemd-resolve --flush-cachesorsudo service dnsmasq restart
>Restart your computer to ensure all changes take effect.

Visit Related Searches: The First Descendant M1-Win64-Shipping.exe – Application Error: [Fixed]


